Click on your model Yonce you've added the model to OpenScale. Click the blue button “Actions” and select “Configure monitors”
You will see the following configuration view. Click “Edit” on the upper right hand corner for the "Training data" box.
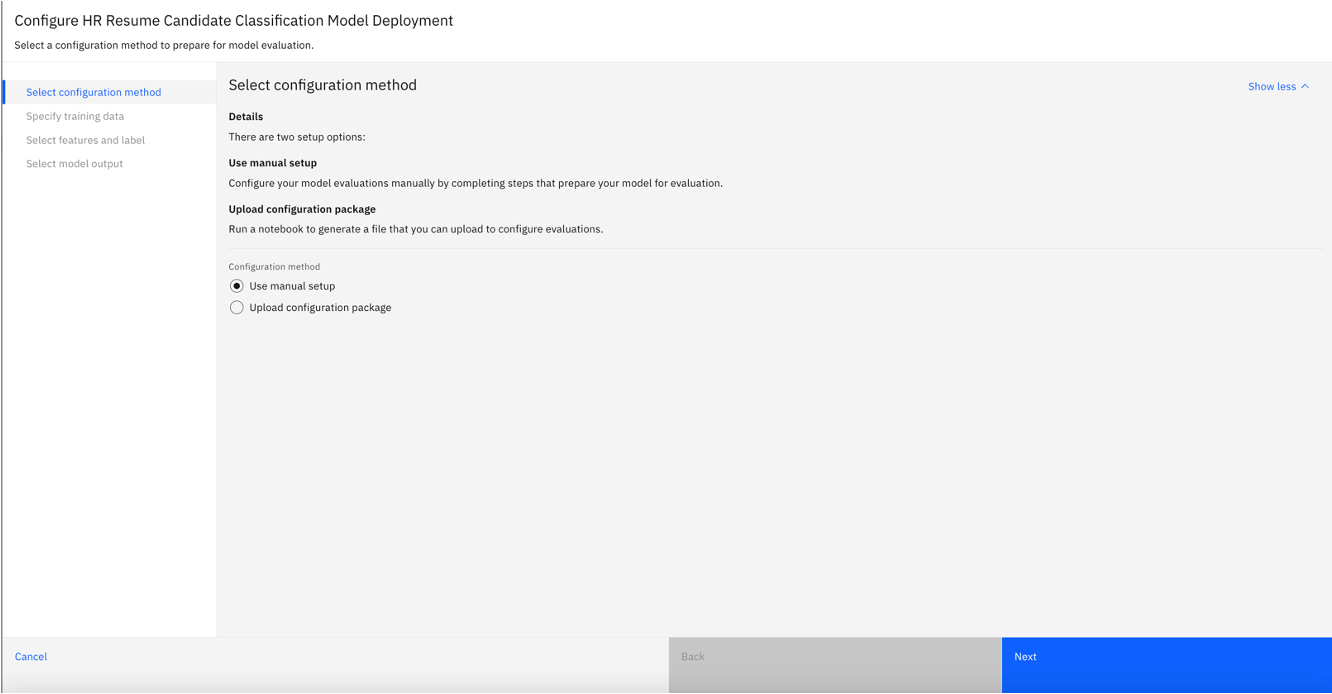
Select “Use manual setup” and click “Next”
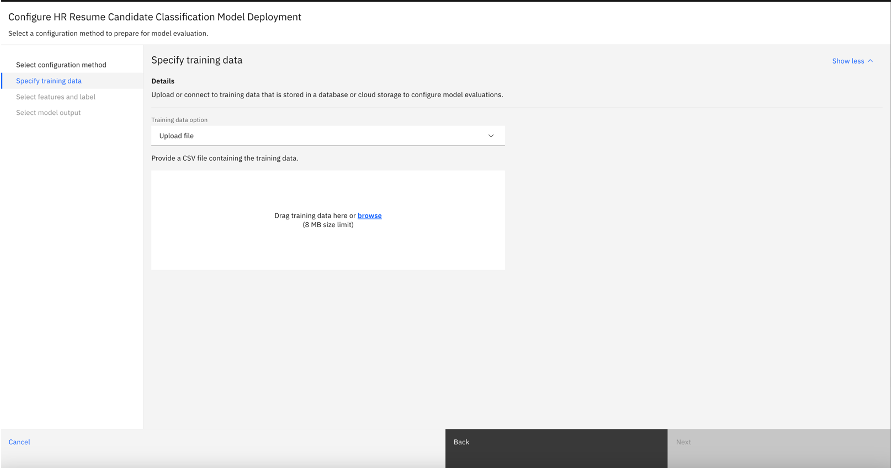
To setup the monitoring, we would need to provide training data and specify what are the data features that we want to monitor on. For Training data option, select “Upload file” from the dropdown list as we will be uploading a training dataset in this example. Browse the training dataset file, select “Comma” from the dropdown for Select delimiter, as the csv file is being separated by comma. Click ”Next”.
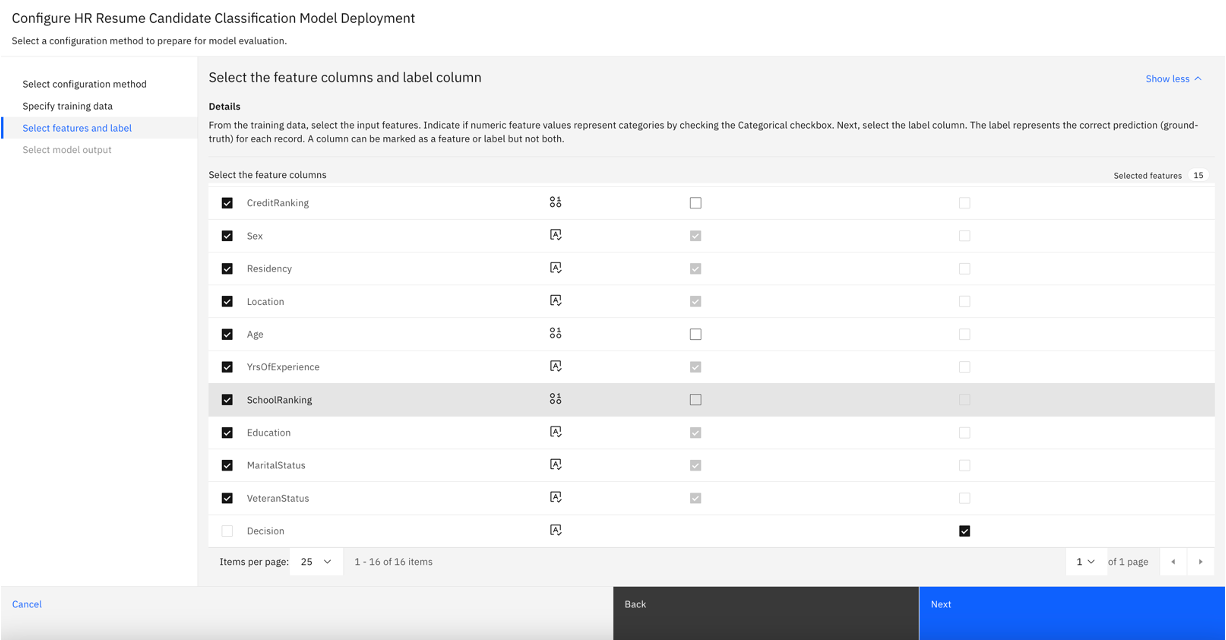
You will see this view with the data column information in the submitted training dataset. Scroll down and make sure that “Decision” is checked for “Label / Target” as that’s the targeted prediction field. Click “Next”
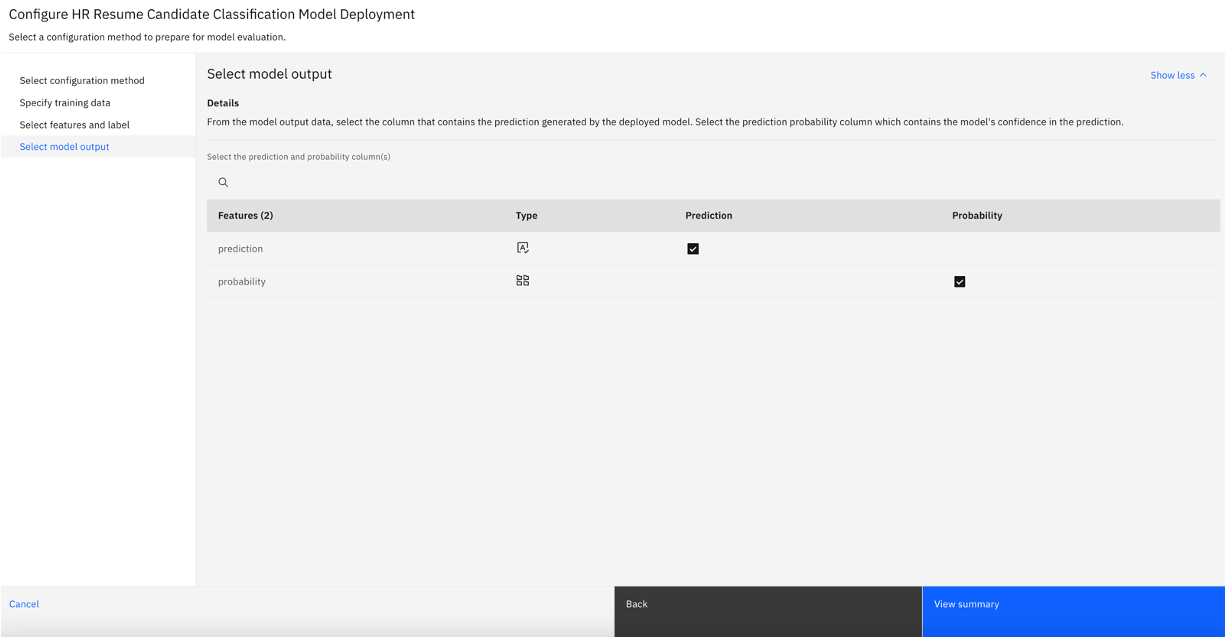
Ensure the prediction and probability are clicked accordingly. Click “View Summary”
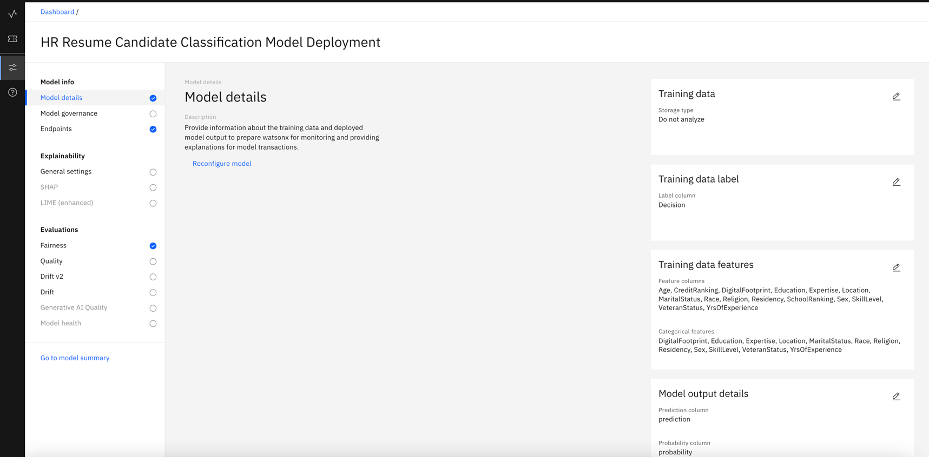
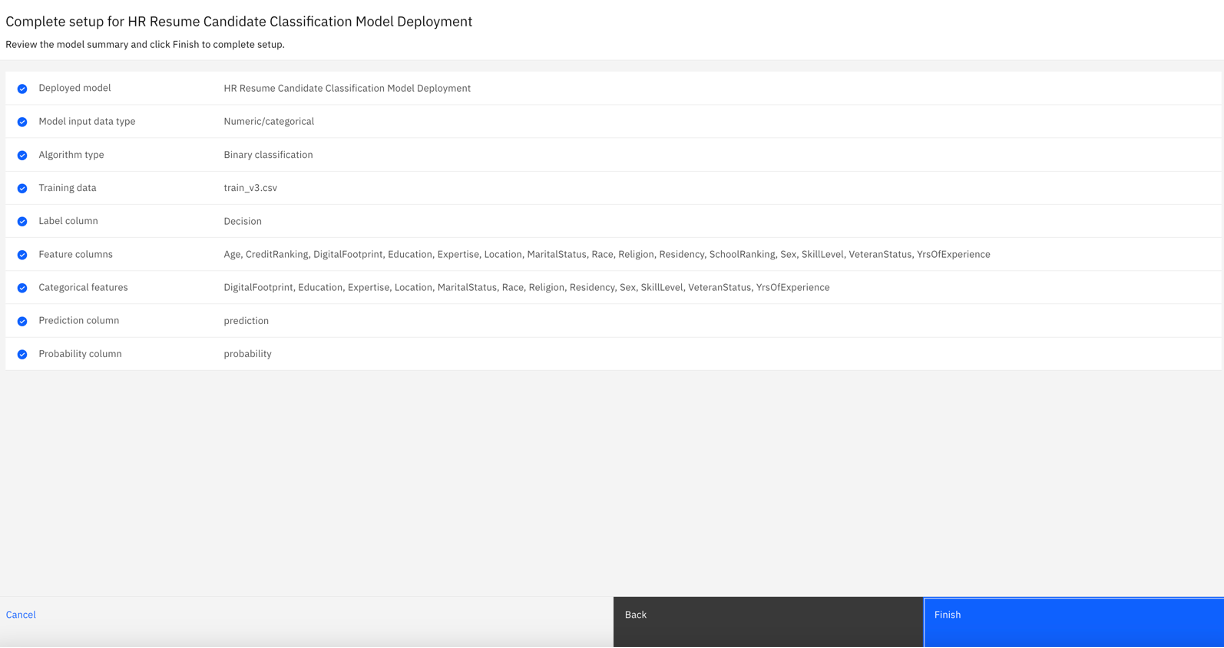
After last step in Configure Model Info section, you will now see this view with the training data attached and the data labels specified.
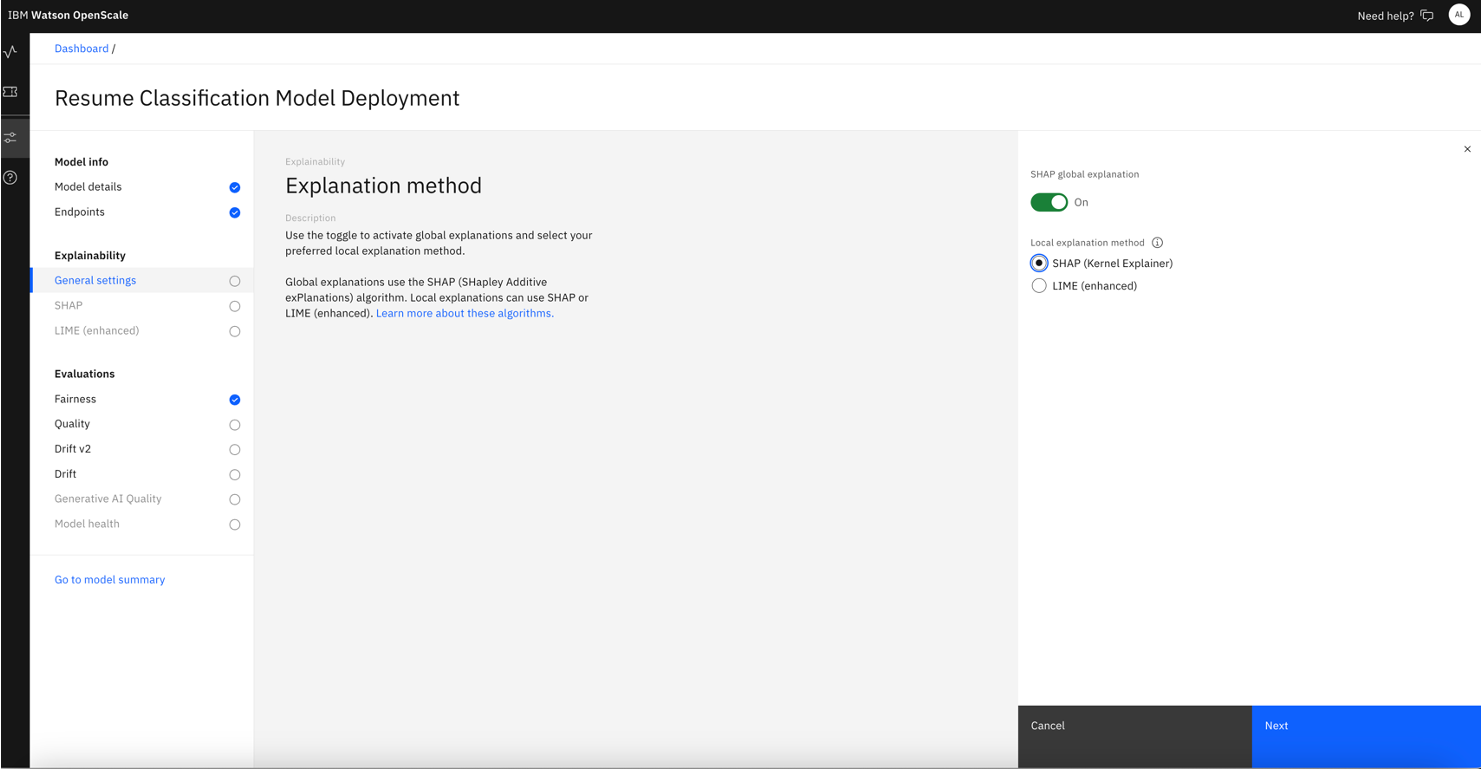
We first configure Explanability. To configure monitoring metrics for explanability, on the left hand side panel, navigate to “General settings” under Explainability. Click on the "Edit" icon for "Explanation method" to start configuration.
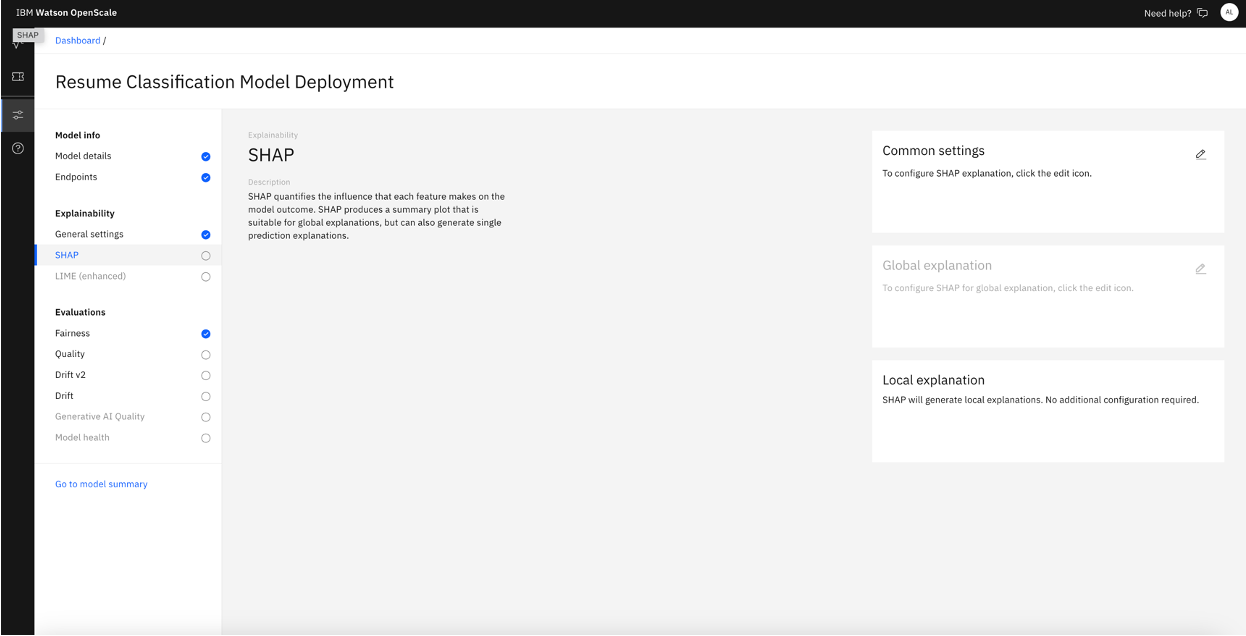
Explanation method: In our example, we will set the SHAP global explanation to “On” and select “SHAP” for Local explanation method. Click “Next”.
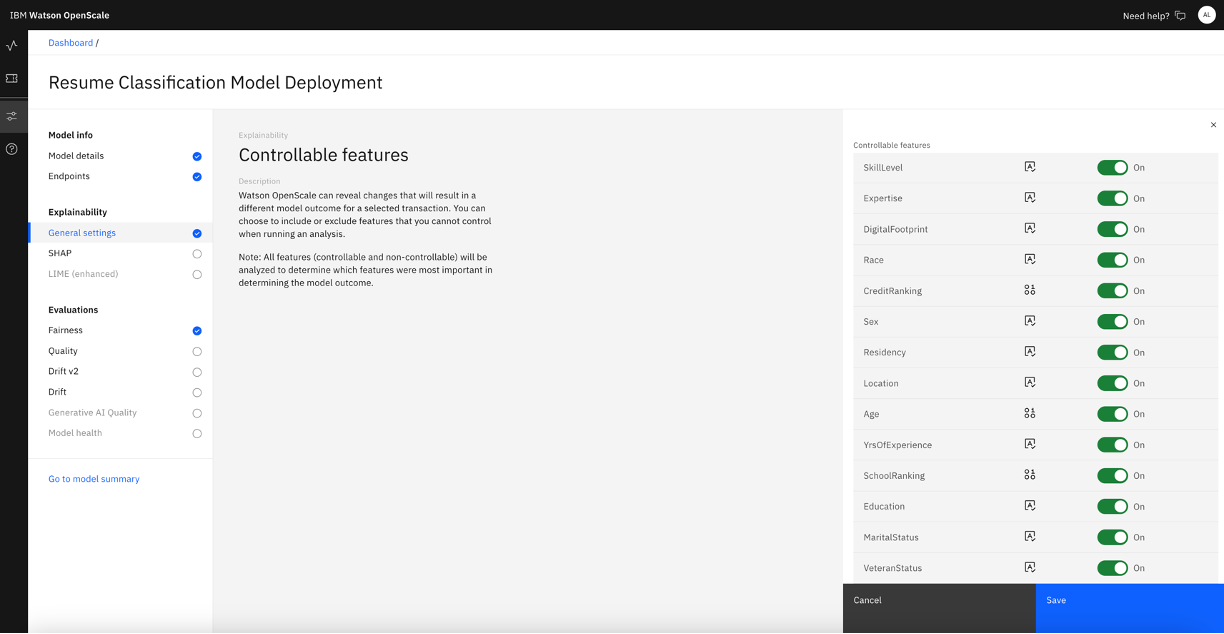
We need to select Controllable features for explanability. Controllable features are features that can be changed and have a significant impact on your model outcomes. In our example, we set all features as controllable, and click “Save”
Once we selected "SHAP" for Explanation method, we will need to configure the SHAP tab. Navigate to the SHAP tab and click the "Edit" icon for "Common Settings" to start configuration.
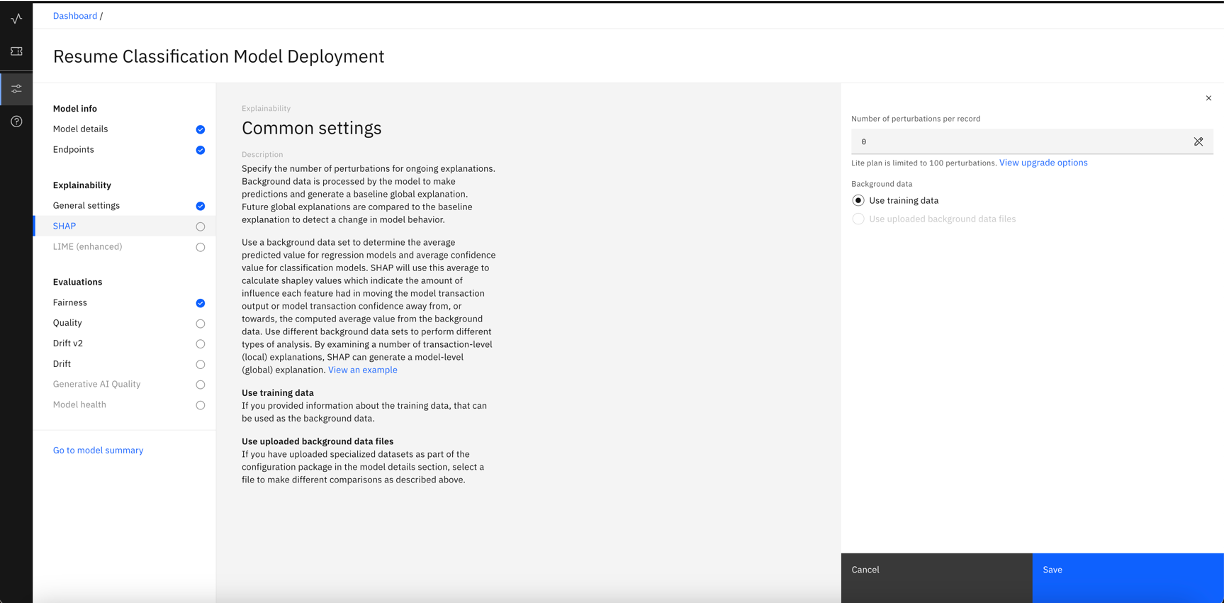
Set the number of perturbations per record. In our example we use the default value 0. Click ”Save”. For more information about SHAP model, click here: Configuring explainability in Watson OpenScale
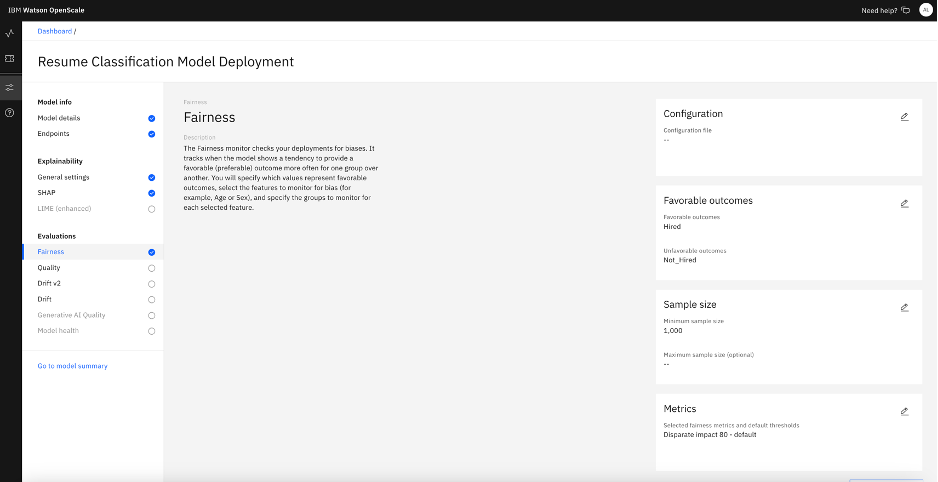
To configure Fairness, navigate to the ”Fairness” tab under Evaluations.
Click “Edit” icon for "Configuration" to configure the metrics. Select “Configure manually” and click “Save”.
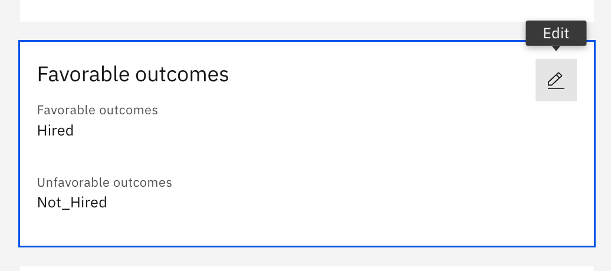
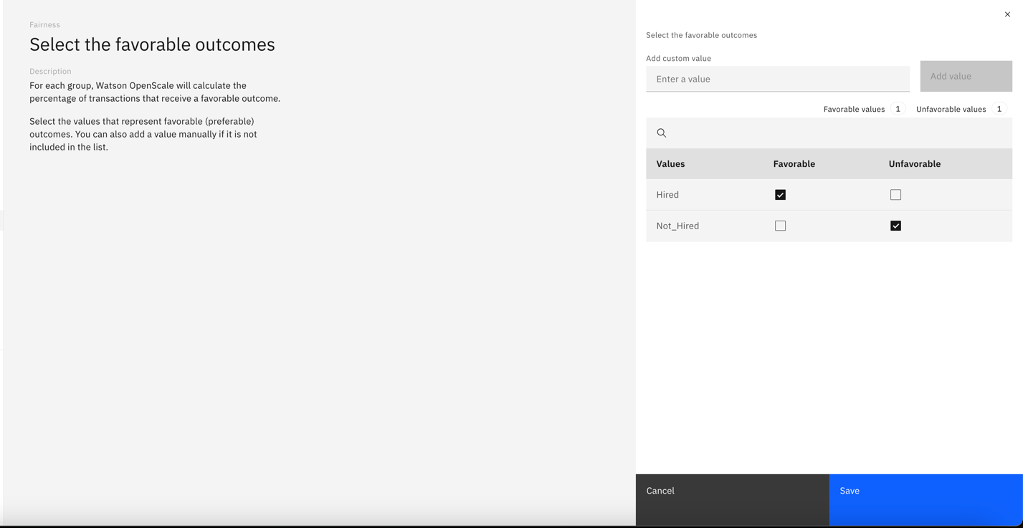
Next, click “Edit” icon for Favorable outcomes to configure.
Configure the Favorable outcomes by selecting the checkboxes according to the use case. In our example, “Hired” is the favorable outcome and “Not_Hired” is the unfavorable outcomes. Click “Save”.
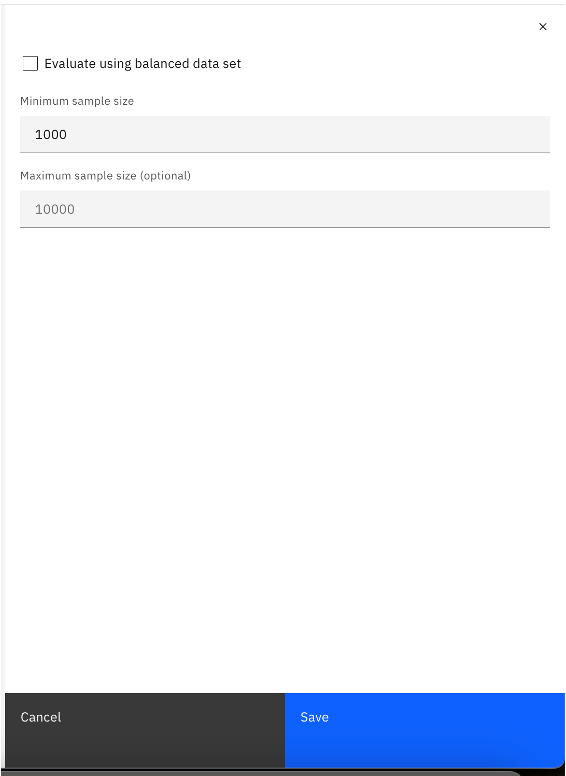
Next, we configre "Sample Size". Click “Edit” icon for "Sample Size" to start configuration.
Set the minimum sample size to a number equal or smaller than the testing data, in our example, we set it as 1000. Click “Save”.
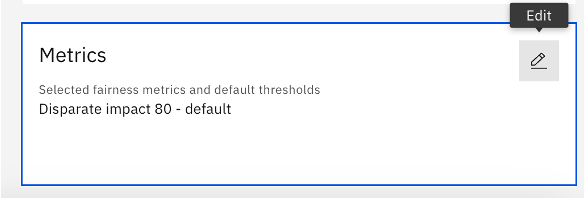
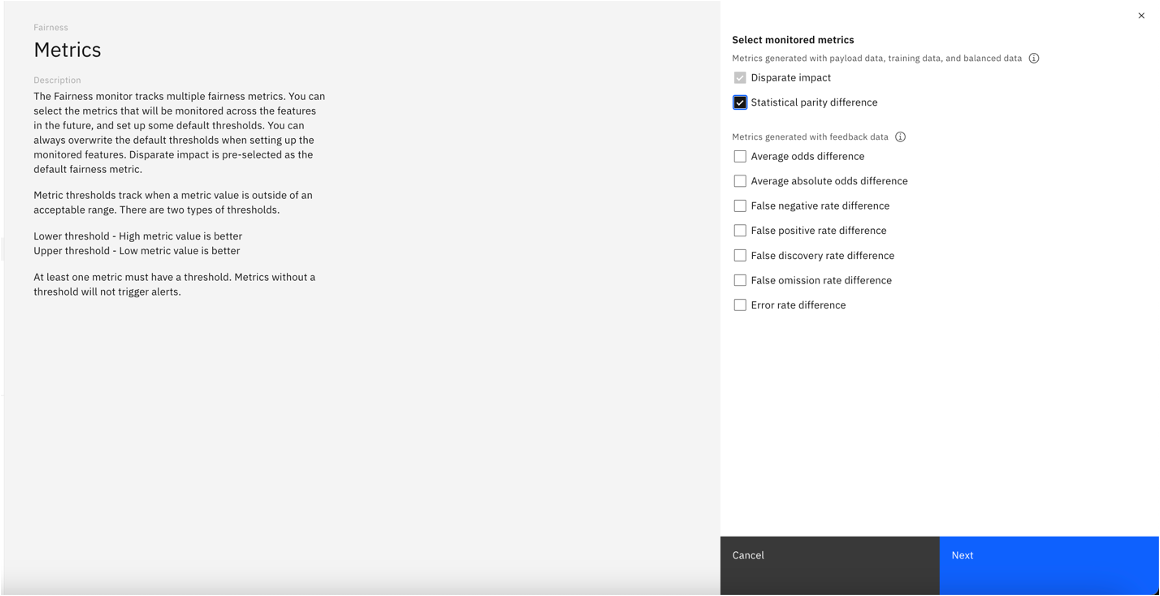
Next, click “Edit” icon for "Metrics" to configure Metrics.
Select metrics that you’d like to monitor. In our example, we additionally select “Statistical parity difference”. Click “Save”.
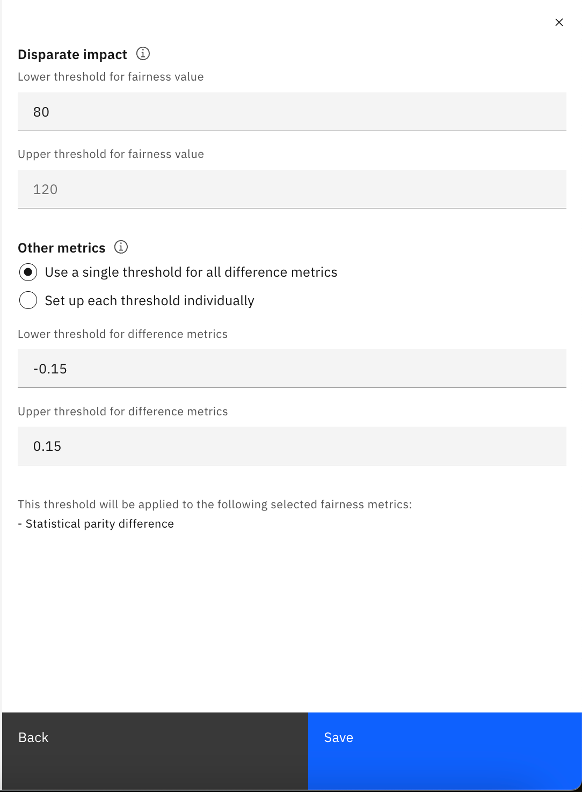
We could then set the lower and upper threshold for fairness value. In our example, we use the default value. Click “Save” to finish the setup.
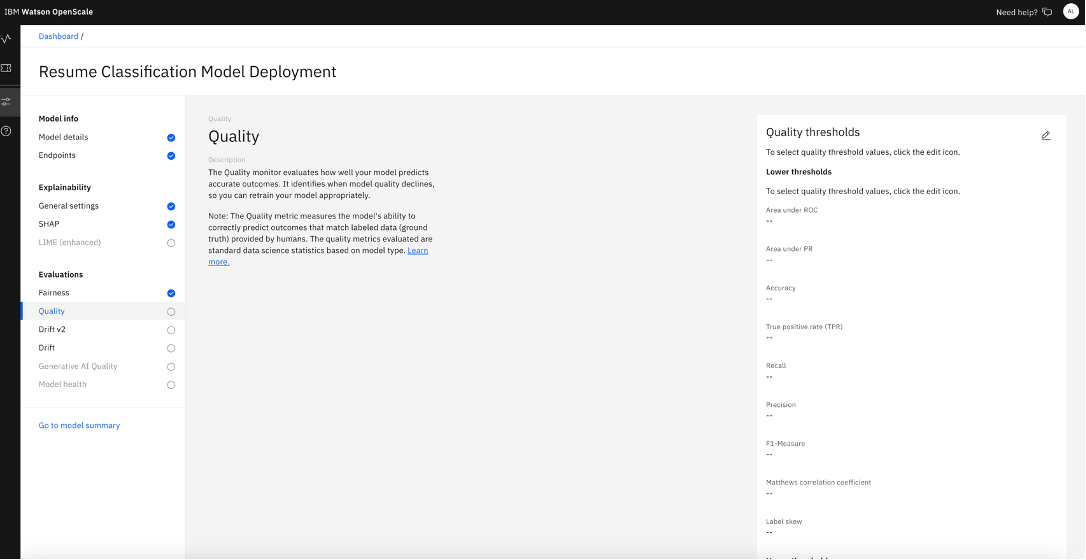
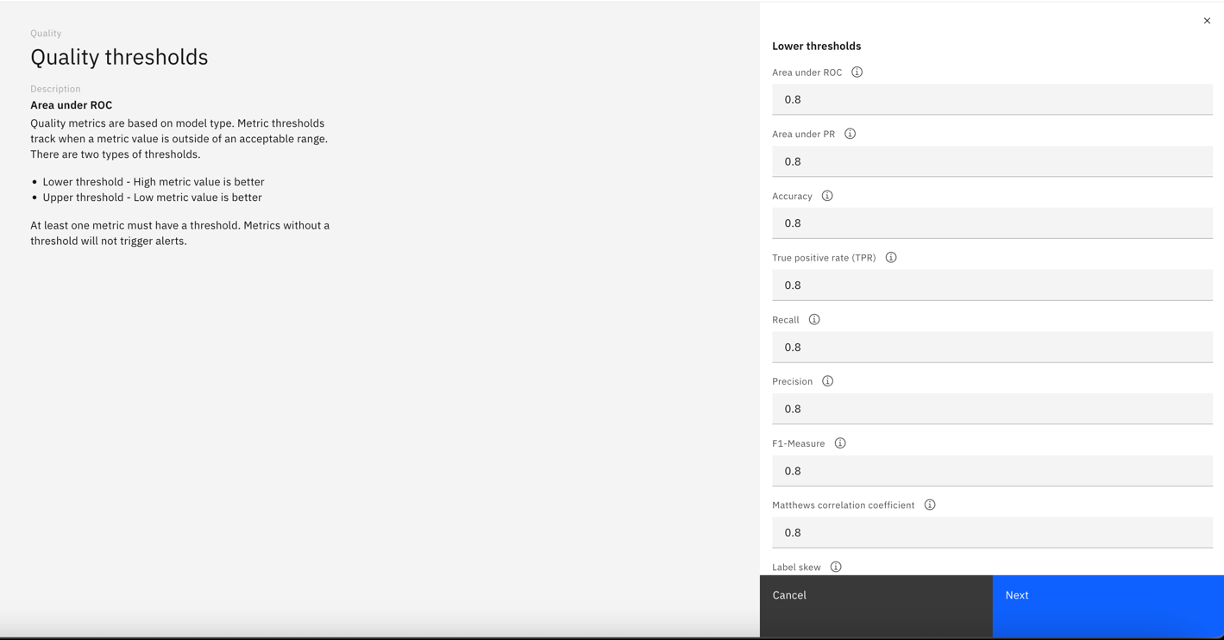
To configure Quality, navigate to the”Quality” tab under Evaluations.
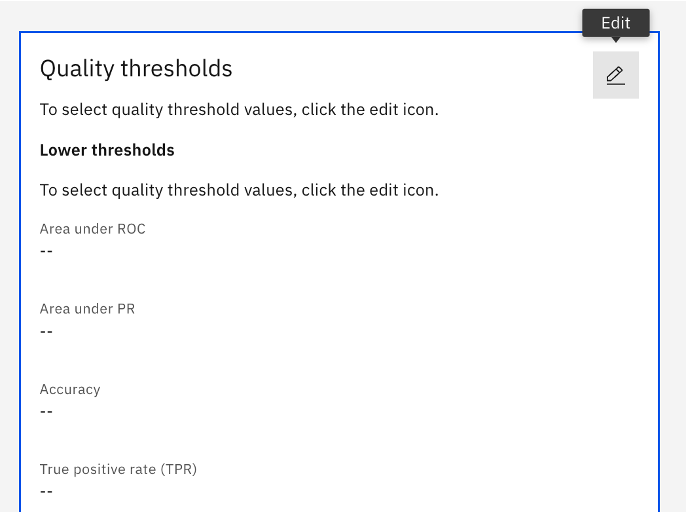
Click “Edit” icon for Quality thresholds to configure the metrics.
For Quality thresholds, review the default setup or change any number based on your project requirement. In our example, we keep the default setup and click “Next”.
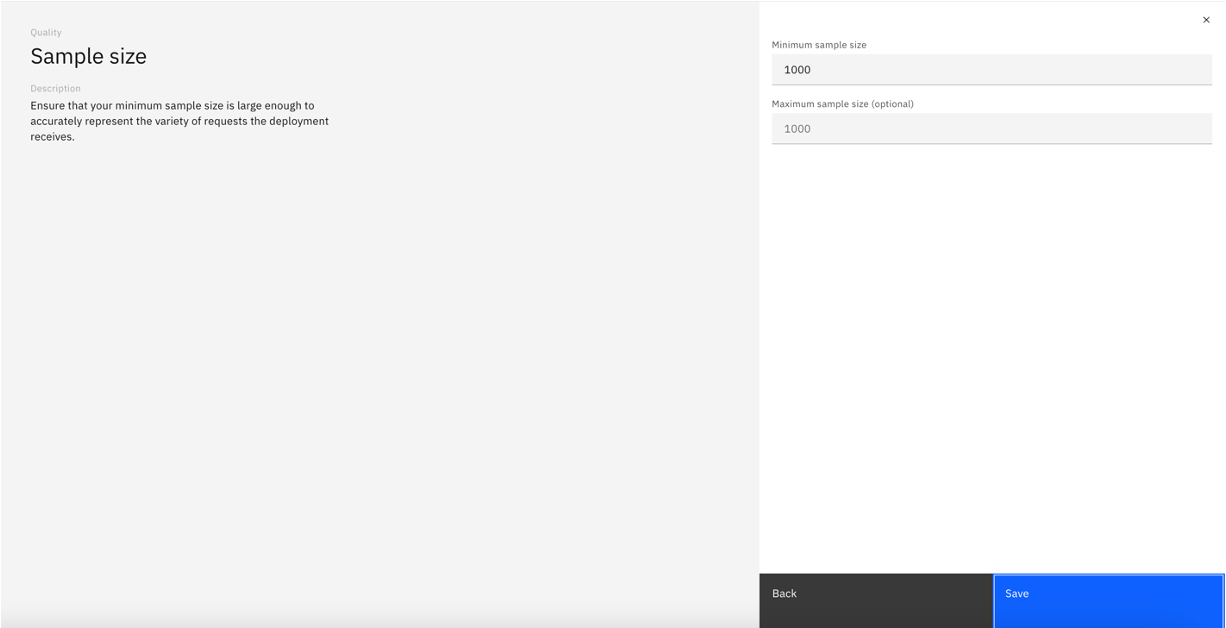
For Sample size, input a number that is equal or smaller than the testing dataset. In our example, we use 1000. Click ”Save”.
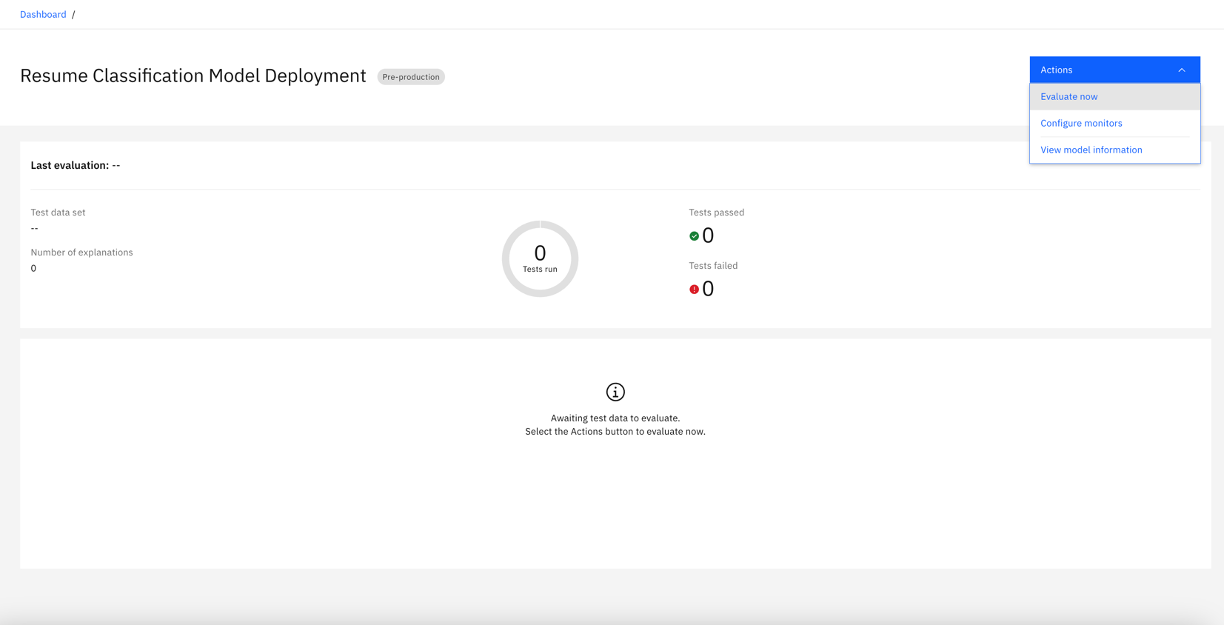
One the configure monitor steps is completed, navigate back to the model summary page and click “Actions” button and select “Evaluate now”.
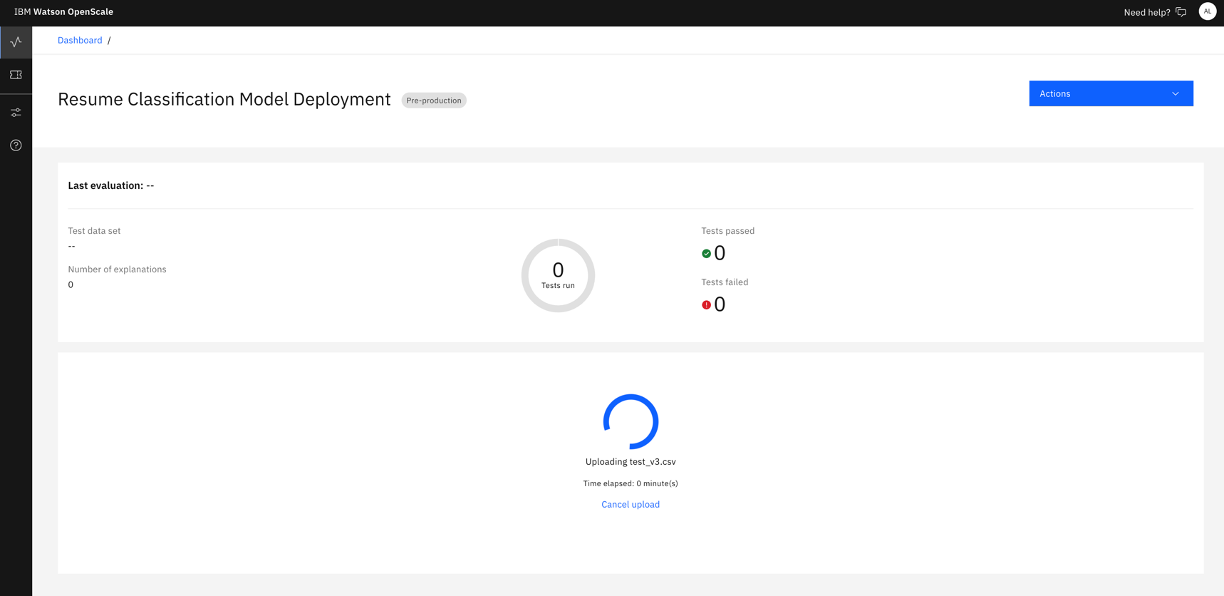
A righthand side panel will appear to “Import test data”. Select “from CSV file” and select testing dataset file. In our example, the “test.csv” file. Click “Upload and Evaluate” to start the evaluation.
The right hand side panel will close and you will see this following view saying “Evaluation in progress”, wait a few minutes to view evaluation results.
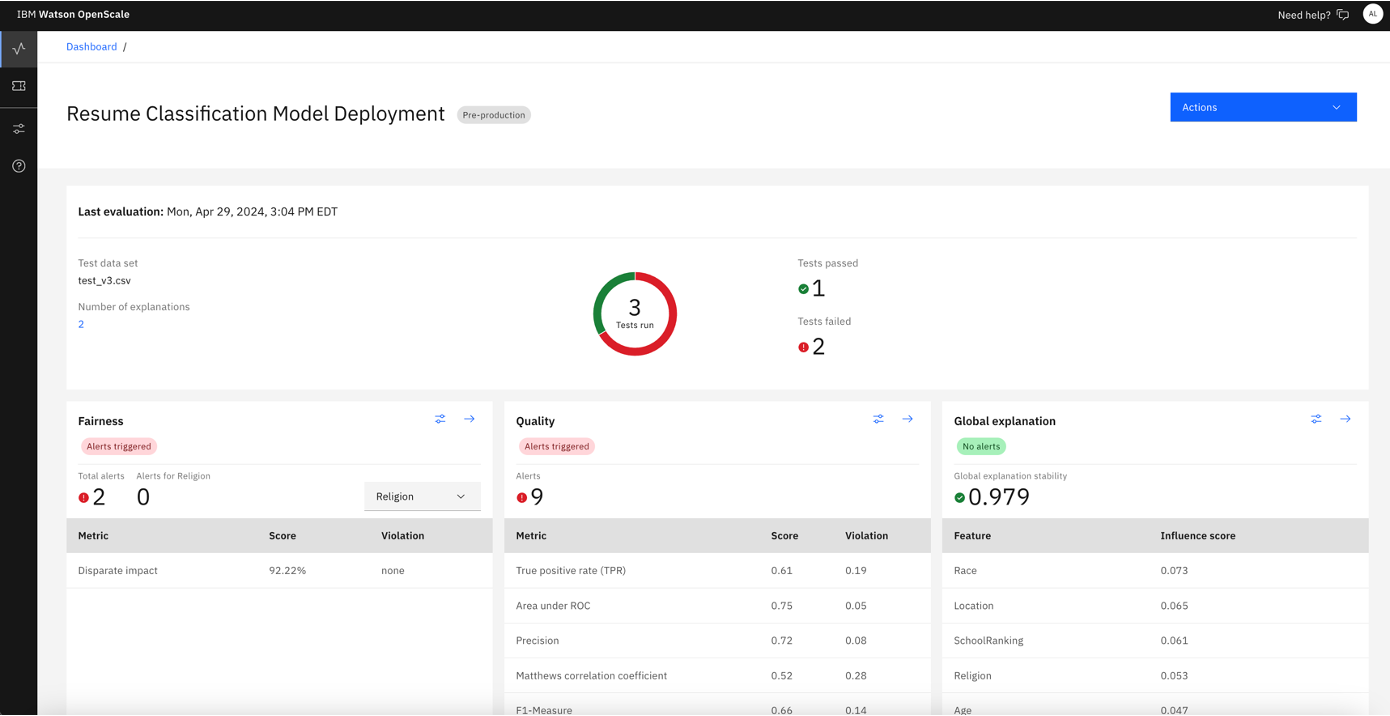
After a few minutes, you will see the evaluation dashboard similar to the screenshot. You’ve finished configuring model governance for a classification model.